Google Forms are very versatile and useful, but the standard features alone do not allow forms to close automatically (close acceptance).
So, in this article, I will explain how to automatically close a form.
The procedure uses Google Apps Script, but it is very simple, so please don’t get defensive.
As a supplement, I have also included a method to automatically “open” forms.
Create Scripts
Create a script to close the form automatically.
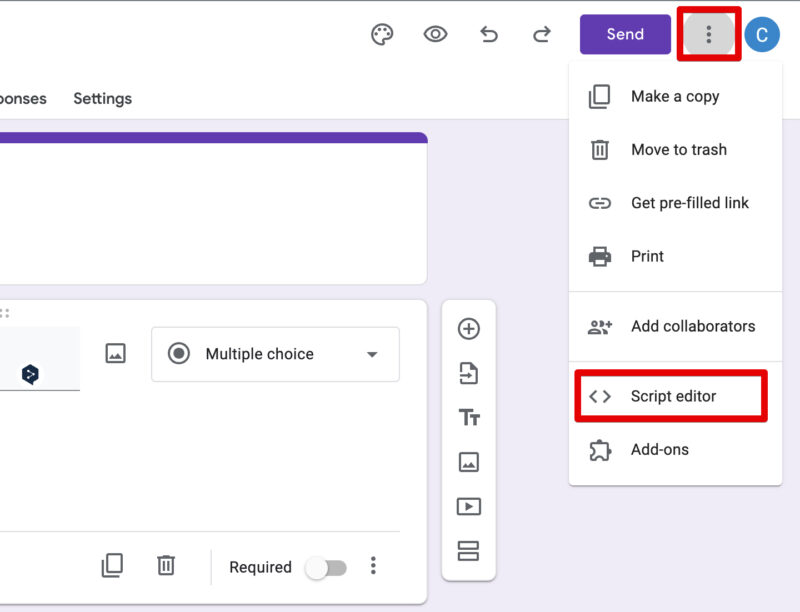
Open the menu and press Script Editor.
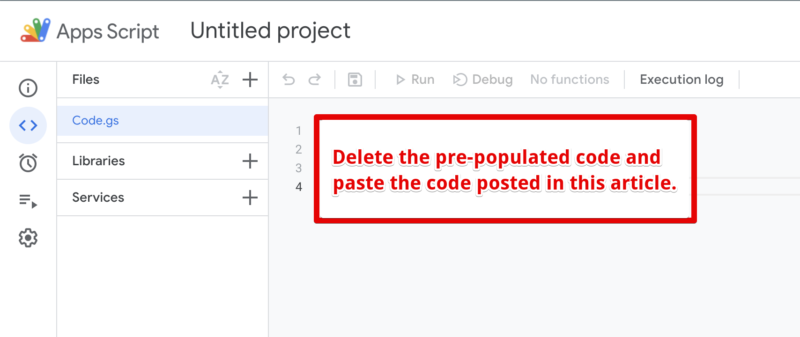
When the script editor starts up, delete all the pre-input scripts “myFunction” as they are unnecessary.
Then paste the code below.
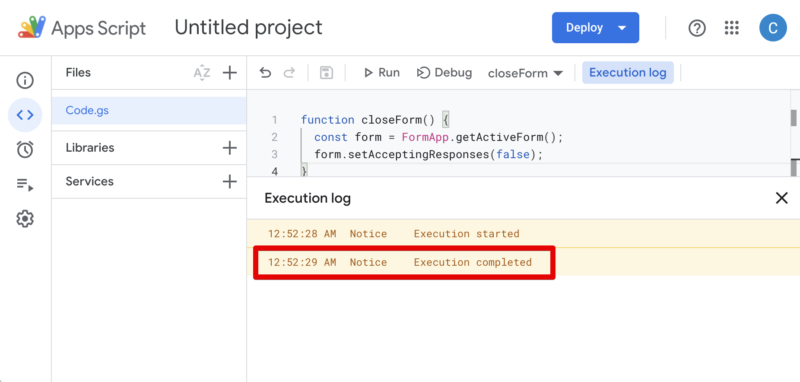
function closeForm() {
  const form = FormApp.getActiveForm();
  form.setAcceptingResponses(false);
}
When this is done, save the script. (You can save it by pressing the floppy disk icon button.)
Script testing and authorization
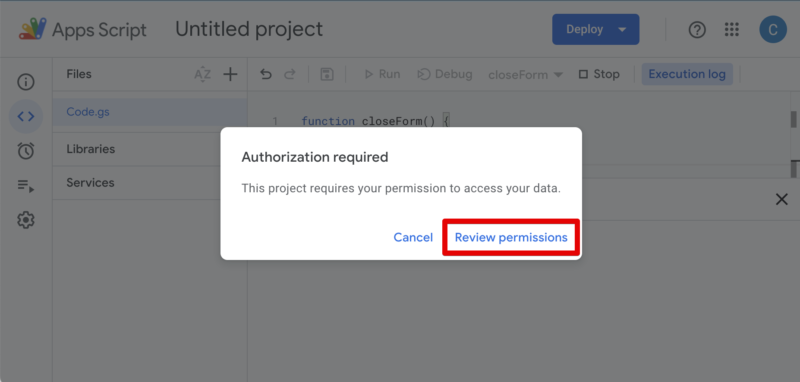
Now that we have created the script, let’s give it a try and press the > Run button to execute it.
The first time you run this script, you must authorize it.
A dialog box will appear asking for authorization, press Review Permissions.
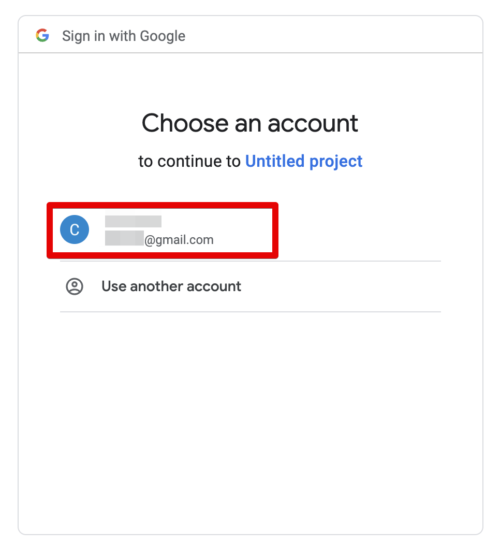
Select your account.
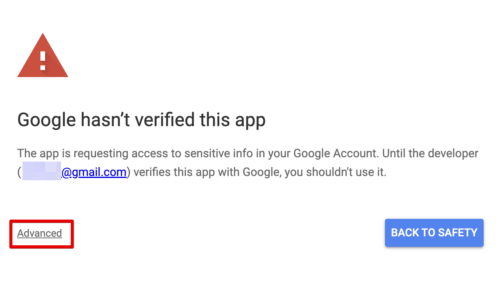
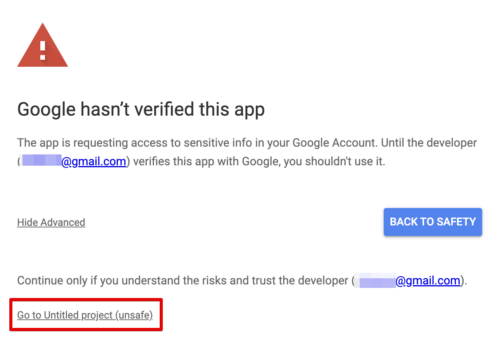
Displayed under certain circumstances:
If you see the alert in the image below, Press “Advanced” and then “Go to Unlimited project (unsafe)”.
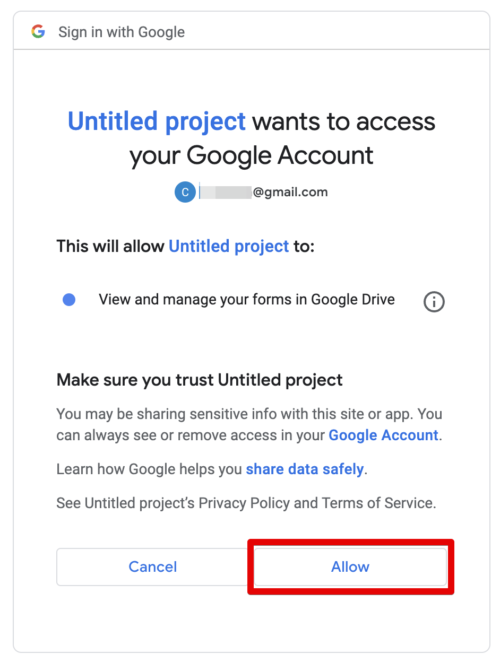
press Allow.
When the authorization is complete, the script is executed.
If the execution log shows “Execution Completed”, the script has been executed correctly.
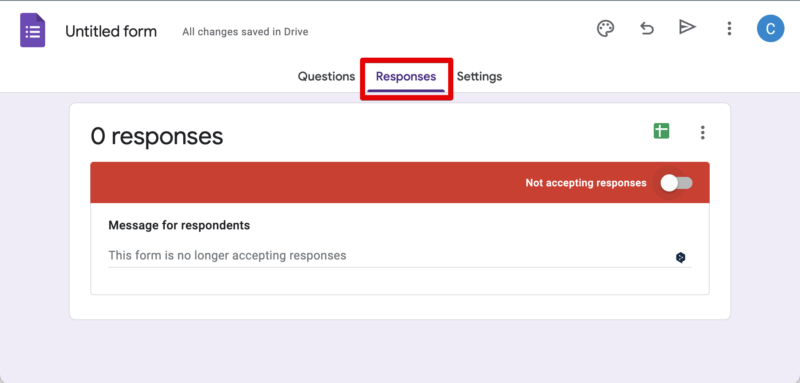
Go back to the Google forms screen and open the “Responses” tab. You will see that the form is now closed.
The test is now complete.
If necessary, you may return the form to the open state on this screen.
Set a time-specified trigger
Now that we have a script that closes the form, you can set it to run automatically at a specified time.
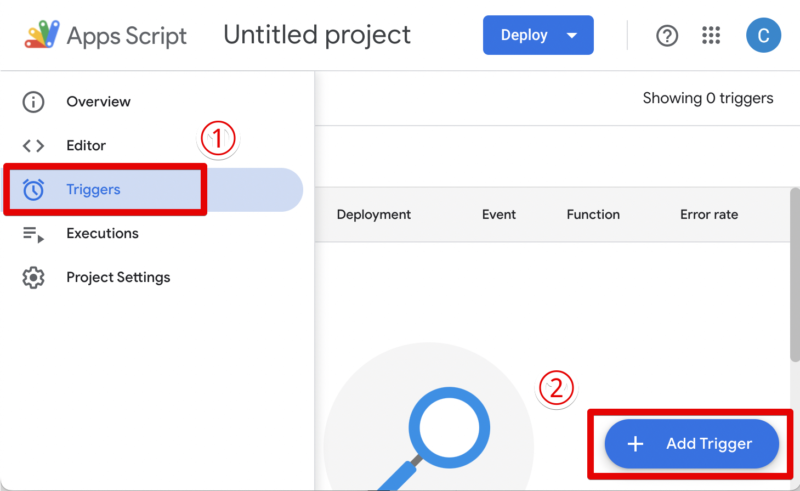
To do so, choose Triggers → Add Trigger.
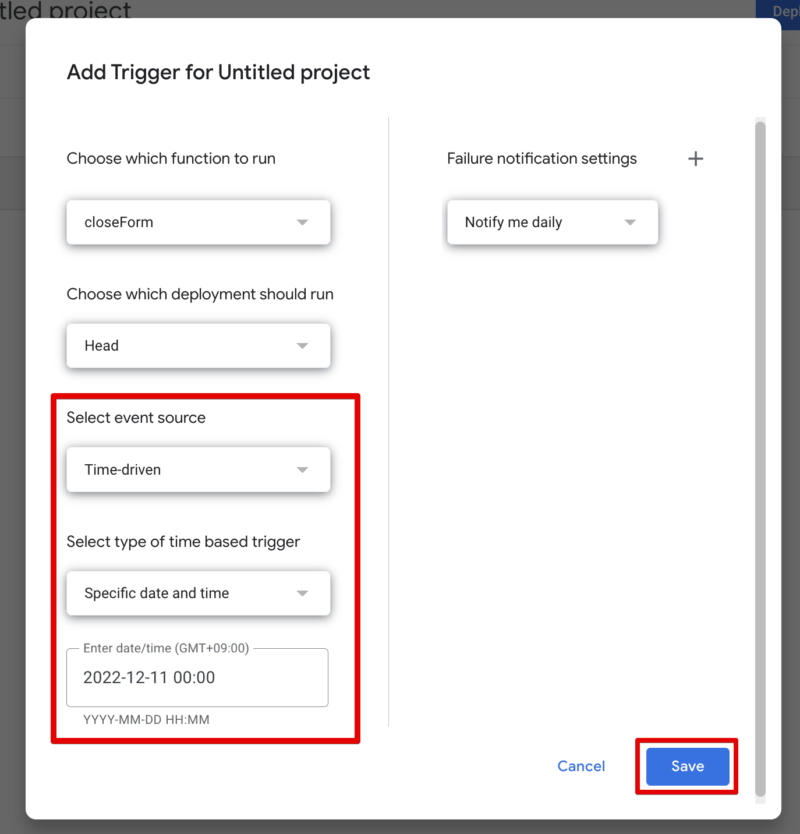
Select Time-driven trigger as the event source and Specific date and time as the type of time based trigger.
Then, in the “Enter date/time” field, enter the date/time you want the form to close automatically and save.
On the “Triggers” screen, you can see the triggers you have saved.
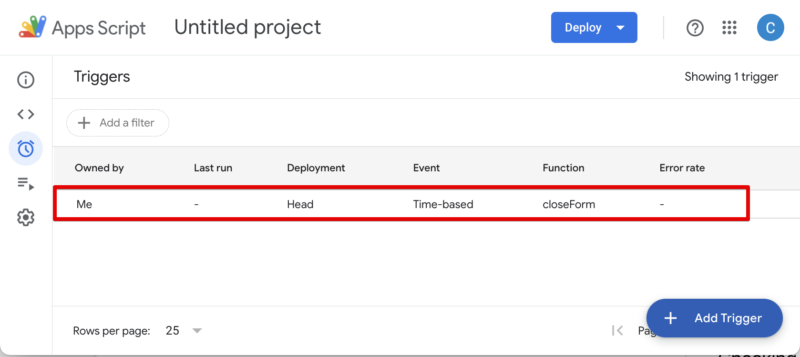
This completes the trigger setup. The form should close automatically at the specified time.
See execution history
On the “Executions” screen, you can see the execution history.
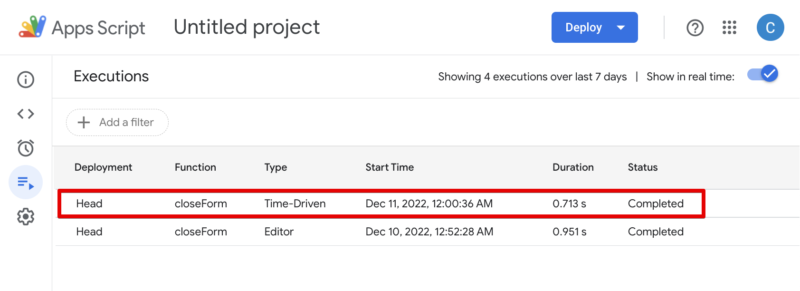
I found that the trigger I set up started at 12:00:36 AM, ran for 0.713 seconds.
Unfortunately, there seems to be a delay of a few seconds to a few dozen seconds….
Extra 1: Automatically open forms
If you want the form to open automatically, add the following script.
function openForm() {
  const form = FormApp.getActiveForm();
  form.setAcceptingResponses(true);
}
The difference from the previous function is the name of the function and the arguments of the “setAcceptingResponses” method.
The argument is set to true instead of false.
When creating a trigger, specify openForm in the “Choose which function to run” field.
Extra 2: Notify by e-mail when the process is completed
If you would like to receive an email notification when the process is complete, modify the script as follows.
function closeForm() {
  const form = FormApp.getActiveForm();
  form.setAcceptingResponses(false);
  const recipient = "sample@gmail.com";         // Recipient's email address
  const subject = "Form closed.";               // Subject of the email
  const body = "Application form closed.";      // Body of the email
  GmailApp.sendEmail(recipient, subject, body)
}
Please change the recipient, subject, and body to match your needs.
If you are creative, you can include the title of the form and the URL to view the responses in the email.
function closeForm() {
  const form = FormApp.getActiveForm();
  form.setAcceptingResponses(false);
  const formName = form.getTitle();
  const url = form.getEditUrl() + "#responses";
  const recipient = "sample@gmail.com";
  const subject = formName + " is now closed.";
  const body = formName + " is now closed.\nPlease check the following URL.\n" + url;
  GmailApp.sendEmail(recipient, subject, body)
}
Since added the Mail Sending Function, you need to authorize it again.
It seems that the getTitle method sometimes does not get the title of the form properly. If this is the case, try changing the title and saving it from the Google Forms edit screen.
Then run the script again and you should be able to retrieve the form title.
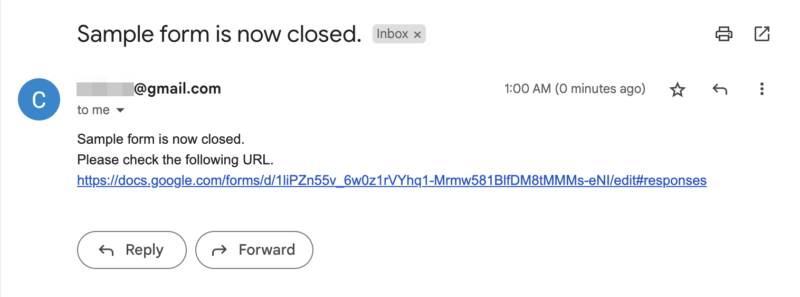
If you run this script, you will receive the email in the image below.
Extra 3: Close the form according to the number of responses
It is also possible to automatically close the form when the number of responses reaches a limit you set.
For reference, the code and trigger settings are shown below.
function closeForm() {
  const form = FormApp.getActiveForm();
  const limit = 10;
  const responses = form.getResponses();
  if (responses.length >= limit){
    form.setAcceptingResponses(false);
  }
}
The limit = 10 in the third line of the code means that the form will be closed when 10 responses are received. Change this value to match your requirements.
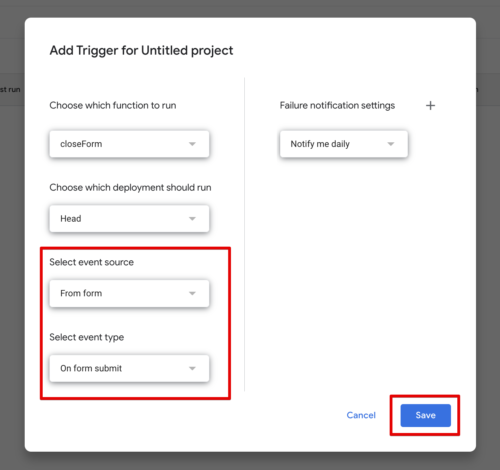
This process must be performed each time a form response is received.
This process should be executed each time a form response is received. Therefore, when setting up the trigger, select From form as the event source and On form submit as the event type.
Comments